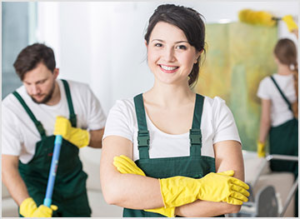
The truth is that if someone got sick in your office, you probably wouldn’t be able to figure out how they became ill. Even after you become aware of the outbreak, it can be nearly impossible to determine where or when the illness first spread throughout the building. The quick answer to this question is that sanitizing an office should happen as frequently as possible. But there are a few other things you should consider before taking this step…
No one wants to admit it, but many people don’t clean their homes often enough. For example, statistics indicate that at least 50 percent of households have never had their carpets professionally cleaned. This means that every time someone enters these buildings, they are placed at risk for asthma and allergies. The same logic applies to your office building. If you aren’t sanitizing it regularly, then the risk of someone getting sick is too great.
Sit down and think about what people in your office do throughout the day. Do they interact with customers or clients? Do they handle paperwork that needs to be stored for future use? Is there anything else they do that could potentially cause harm if left unchecked? These are all great questions to ask when trying to determine how often an office should be sanitized.
If you think back to my initial statement about cleaning, I noted that most people don’t clean their carpets enough. This proves that we must also take into consideration the type of flooring we have in our homes and offices. This means that carpet cleaning will be a requirement for your building. The good news is that an office sanitization company should have no problem doing this for you when they come in to provide other services, so keep this in mind when hiring someone.
What if the carpets can’t just be removed? What if there are some areas of carpeting in every room, but only concrete floors exist in hallways and break rooms? You’ll just have to figure out how often you need professional sanitizing services based on the details of your specific office space.
If you’re lucky enough to never have pets in your building, then you won’t need to worry about urine-based pet odors. But if that’s not the case, then professional carpet cleaning may be something else you want to take care of with your office sanitization service.
As these tips show, it can be tricky to decide how often your office needs sanitizing. The flooring choices are also important when figuring out the answer to this question. If possible, try leaving an empty room in your office for a few weeks before hiring someone. Then check back on the floors every once in a while to see if any dirt or grime has built up after repeated use. This will help give you an idea of what is acceptable and what isn’t.
If you aren’t sure, then the best option is to hire a professional to do it for you. Your health and well-being should always be your priority when entering any building, especially an office. If there’s a chance that you’ll end up getting sick, then hiring a company that does this sort of work will benefit everyone in the long run.
A deep cleaning of an office is a thorough cleaning that goes beyond regular janitorial service and cleans all surfaces, including light switch plates, door handles, countertops, and more. While no two offices are exactly alike, this type of cleaning can generally take 4-5 hours to complete and requires special equipment like stair tools and telescoping wands for hard-to-reach areas.
1) The biggest part of an office deep clean is taking down your company’s blinds and window dressings (on the inside) to wash them thoroughly with glass cleaner. You’ll then start in one corner of the room and dust everything from ceiling to floor including tops of doors, wall hangings (such as pictures, posters, and awards), ceiling tiles, light switch plates, air grid vents, countertops, and backsplash areas.
2) Dust and vacuum all baseboards and corners. This helps to remove accumulated dust and grime that might otherwise collect along windowsills, around shelves, or in other hard-to-reach places.
3) Clean the surfaces of your workstations. Whether you have cubicles or open floor plans, it’s time to give your desks a thorough cleaning. You’ll start with the top then move down to the keyboard area (don’t forget inside drawers!), underneath it, and around all edges of the desk. If you use filing cabinets, their handles need special attention too which means cleaning them up top and down below. If you have any office chairs, make sure to clean their armrests and backs as well!
4) Clean your telephones, lamps, and all other workstation accessories after dusting them off first. This includes anything that sits on or next to your desks that doesn’t get replaced every day – like the water cooler, coffee maker, or mini fridge.
5) Clear away all excess personal items from the floor so janitors can mop them.
6) Move onto walls with a special cleaning solution for various surfaces around the office including vinyl walls, tiled/wallpapered walls, or painted dry-walled spaces. Be sure to move light switches before washing along with these areas too! A thorough cleaning of baseboards will remove any dirt that may have been collected there.
7) Now it’s time to clean windows, which means removing your blinds and hangings first for washing before moving on to the outside of the windows with squeegees left out overnight. If you have a window on your door, make sure to clean its glass too.
8) After dusting all surfaces at workstations again, replace items on desktops using this order: computer monitor first, then keyboard tray below it. Finish by replacing telephones next before scooping up excess papers into filing bins or folders that are easy to replace in file cabinets or desks. You can then move on to replacing anything else that has been pulled out of drawers, shelves, or cubicles (like hanging files).
9) Replace blinds/window dressings on the outside of windows, then sweep up any dirt that may have accumulated along baseboards with a broom. You can now also dust cubicles or other areas too.
10) Finish by replacing office chairs to their original position after wiping down armrests and backs. This is also true for filing cabinets as well as anything else you cleaned during your deep clean!
The COVID-19 Cleaning Instructions must be followed immediately after an outbreak or other event deemed necessary by the relevant authorities.
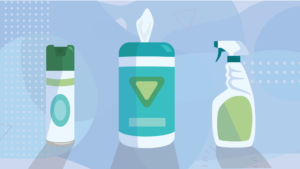
Cleaning agents include:
Water (Tap, if available)
Household bleach (1 part chlorine to 10 parts water), cleaned with WATER ONLY, then rinse with tap water.
Household vinegar (5% acetic acid solution) Solution strength does not matter for this method. Use CLEAN water to rinse afterward.
Cloudy ammonia (20% ammonium hydroxide solution). Solution strength doesn’t matter; it can be mixed directly in its original container for immediate use. Other household alkaline cleaners like Drano may also be used instead of ammonia, but make sure they are mixed in water before use.
DO NOT USE SOLVENTS, OIL SOAP, RUST REMOVERS, OR OTHER CHEMICALS.
This will not work on other viruses that are not Coronavirus. Bleach or ammonia can be toxic if misused or ingested; see the next section for more information.
Water and vinegar do not kill Coronavirus well, but large amounts of it help flush out surfaces which reduce potential infection rates due to inhalation/ingestion during cleanup. Do not drink either solution. Avoid using ammonia around children.
Household bleach has a corrosive effect if ingested; follow safety precautions when handling this chemical. Do not mix chlorine bleach with other cleaning agents for any reason.
Make sure to license hazmat workers if their profession includes activities related to COVID-19 virus cleanup and decontamination.
All cleansing agents should be stirred, shaken, or otherwise mixed before being added to the cleaning solution. The combination of all cleansing agents ensures complete disinfection.
Industrial strength cleaner must be used if there is heavy organic matter (feces, blood, mold), debris, or other contaminants on any surface (floors, walls, etc.). This should only be used by trained hazmat workers; make sure not to touch this product with bare skin.
All surfaces should break down into the water after scrubbing thoroughly with the industrial-strength cleaner.
Hire a hazmat-trained contractor if possible; make sure they are trained by reliable sources or organizations with federal credentials. This is not an option for lower-risk areas but can be used in higher-risk areas after making sure all potential exposure routes are sealed off.
If you think your workforce might become infected, do what is necessary to prevent that from happening before you hire anyone. Make sure no one is allowed into potentially hazardous areas until the area has been checked and deemed safe by a qualified inspector/decontamination technician. Make sure there are at least two routes available when entering any potentially contaminated zone so that if someone does come down with COVID-19, they can be isolated and the outbreak contained quickly.
Workers should shower with soap before leaving work to make sure any Coronavirus particles are removed from their skin/hair. This will prevent potential infection during the commute home. People who wear contact lenses should also wash frequently with soap or disinfectant wipes; you may experience eye irritation if infected particles enter your eyes after working in an environment where COVID-19 is present.
This measure ensures that all potentially hazardous fluids are washed out of the flooring solution – do not worry about what happens to them because you won’t have to pay for it later on. This is now someone else’s problem. Make sure to work on a surface that flooring solution does not get onto so the rest of the material is still intact after you are done.
Whenever possible, keep dangerous areas sealed off until they can be properly decontaminated. Make sure all employees and contractors entering these regions know that the COVID-19 virus cannot be exposed to skin and exposed skin should always be covered or covered with gloves. This prevents accidental exposure to infected fluids while cleaning them up. All exposed items should be treated as contaminated and disposed of at a licensed landfill; remember to alert your hazmat crew in advance if you plan on disposing of any biohazardous materials by this route because it’s not your decision when to do it.
A pest infestation at home is usually dealt with by reaching for a handy can of insecticide. The chemicals in these sprays can hurt more than pests, as scientists have been warning for a long time. DEET, the most prevalent of these insect repellents, for example, can induce negative effects ranging from skin blisters to nerve damage when used repeatedly.
Products made from natural ingredients have considerably fewer adverse effects than those made from chemicals Whatever household pests you’re trying to eliminate, here are some natural ways to do it.
Besides being an annoyance, mosquitoes are capable of causing a wide range of diseases, such as vector-borne illnesses and even epidemics like malaria and the Zika virus.
Malaria can be prevented by avoiding mosquito bites in the first place. If you’re trying to keep mosquitoes away, a simple mosquito net is your best 3 Mozzies are kept out of mosquito nets by having openings large enough to let the air in yet small enough to keep.
Using insecticide-treated bed nets that last a long time Long-lasting insecticide bed nets (LLIN) is an important malaria control method, according to the World Health Organization (WHO). 4 Several plant products have been widely explored for their mosquito repellent characteristics throughout the years, however, their usage in LLIN has some limits. As a result, the majority of them wash away in the water and cannot be easily fastened to As of right now, trials are still being conducted to determine the most effective technique to infuse nets. At sparkle office cleaning services we use the best techniques to get rid of bugs.
Citronella candles with a 3 percent concentration and citronella incense with a 5 percent concentration were put to the test in a field trial. As a result of the usage of citronella oil, the frequency of mosquito bites on Mosquito bites were reduced with ordinary candles as well. Researchers believe mosquitoes stayed away from the test subjects because of the heat, light, moisture, and carbon dioxide produced by the basic candles. 6 Citronella’s essential oil contains chemicals such as citronellol and geraniol. The odour of both repels insects.
Make an amber spray bottle with 2 ounces of water and 8 drops each of rosemary and lemongrass essential oils. Add 4 drops of geranium essential oil. If you want to keep insects at bay, shake the bottle vigorously and spray Amber bottles to prevent light-sensitive essential oils against oxidation and loss in quality by blocking light from reaching them.
Citronella, lavender, tea tree and eucalyptus oils, 1/2 teaspoon of vegetable glycerin, and 14 fluid ounces of witch hazel or vodka are combined in a 16-ounce spray container (yes, vodka). If you want to repel mosquitoes, shake thoroughly and spray around the house.
Combine four millilitres of neem oil with ten drops each of spike lavender oil and lemon eucalyptus oil in a solution. It’s best to moisten your hands before taking a few drops of this Your palms should be rubbed vigorously, and the product should be In contrast to repelling insects, essential oils also hide the pungent scent of neem oil.
Contact us for the best house cleaning services in Melbourne at (03) 8610 6350, +61421830198.
Rugs with thick piles, such as high-pile wool rugs or shaggy flokatis, are gorgeous to look at as well as warm It’s possible that you won’t be able to use a vacuum cleaner or rent a steam cleaner to clean them. In the 1970s, why did shag rugs go out of style? Because they’re a pain to clean. Shag rugs have swallowed up entire plates of appetisers!
No matter how clean a place is, dust and grime will fall on a rug and make it look dirty even if no one Airborne dust mites, pollen, and other allergens circulating in your home through windows, doors, In other words, even if you don’t use your rug very much, you’ll Fibers such as wool are severely damaged by dirt. By walking on a dirt-filled carpet, you contribute to the wear and tear of its fibres, as grit from sandy soil cuts the wool fibre. When was the last time you saw a worn-out Oriental rug? Eventually, sand will accomplish that. What makes wool fibres so important in rug-making are the same traits that might lead to wear and tear: wool is wonderful at disguising dirt.
If you wish to remove the dirt off the rug, utilise your vacuum’s power brush head. For shag rugs, the easiest approach to clean them is to not use a vacuum at all but to shake them outside. On a railing, clothesline, or fence you can hang it up. You can also call three buddies around and have them each grasp a corner of the fabric Rug beaters, such as this robust yet flexible rattan variant, are still available. Keep in mind that dirt must be removed on a regular basis and that powerful vacuum cleaners might harm the fibres by pulling them.
As a result of its stain-resistance, wool is easy to hand-clean, The ideal initial step is to spot clean your rug. Flokati is a shaggy wool rug that can take a long time to dry out and mildew is a possibility. If you have a lot of foot activity, low pile wool rugs or wall-to-wall wool carpeting is a good choice because it is easy to clean The shag’s design makes it difficult to clean.
Dirt removal and cleaning by hand are still the most effective methods. Companies that specialise in rug cleaning spend a lot of money on the correct equipment to clean the rug without destroying it. Hand-washing rugs are possible in certain companies’ shallow, sudsy pools. As a result, the technique is time-consuming, but it is the only way to properly clean both the top layer of fibres and the beneath Most people.
Contact us for the best cleaning services in Melbourne at (03) 8610 6350, +61421830198.
It’s amazing how many of us get the simplest chores wrong. Window cleaning comes to mind.
It is possible that even when the sun is shining, your windows are coated in a film of filth, dust, bugs, or watermarks. Spring cleaning includes washing glass so that we can fully enjoy the longer days and beautiful views of nature, and should be on yours too.
From top to bottom, wipe the window with a clean cotton cloth or sponge. Be sure to clean the interior and outside of the frame, as well.
Sparkle office cleaning offers the best cleaning services for your windows. our cleaners are experienced and offer you a great cleaning experience.
There are various ways to clean windows with mineral deposits, but a commercial cleanser may be the most effective.
Whether you’re trying to remove a few inadvertent splatters or you’ve discovered a treasure trove of vintage tile beauty beneath a previous paint job, it’s perfectly possible to remove paint off the tile However, if your tiles’ glaze has cracks, flaking, or webbing, any attempt at removing the paint will likely compound the damage.
You can use this procedure to remove paint splatters if you’ve been a touch reckless during a paint job. Move on to Method 2 if the dried-on paint is still obstinate. While scraping lead-based paint for decades, be sure to wear a dust mask — don’t take any chances with lead-based paint.
Continue with confidence if the paint comes off without damaging the glaze. It’s preferable to go on to Method 3 if you feel any cracking or flaking of the glaze or detect any cracking or flaking.
Wipe the tiles clean with a damp rag. You’ll have to scrape and wipe until all the spatter Then if certain splatters don’t come out, you can try
Paint that has been dried and hardened can be loosened For any paint that is before 1978, wear a dust mask while you work to prevent inhalation of toxic fume
Work on a little area at a time, such as a square foot. You can prevent scorching a surface if you heat up tiles while spinning the gun, and keep doing so until the paint feels soft and tacky, around
With a 45-degree angle scraper, remove paint from tile starting at the outer edge and working in.
Use a clean rag wet with water to clean the surface on a regular basis. You’ll have to keep doing this until all of the paint has been removed.
For tiles older than 20 years, ask your retailer for a paint remover for glazed surfaces with a conservation rating. Whatever paint remover you decide to use, make sure that the area where you are working is well aired by opening windows
Use a home cleanser or a 50/50 mix of white vinegar and water to clean painted tiles. Then wipe the surface with a moist towel to neutralise it. Be sure to put on your goggles and gloves before you
Test the tile’s capacity to handle the paint remover in an inconspicuous location. Using a clean rag, liberally apply paint remover as indicated on the label.
Remove the paint using a plastic scraper held at a 45-degree angle. Use a remover after scraping. Providing the glaze has not been damaged, the rest of the tile can be finished as well. The tiles will need to be refinished if the glaze is damaged.
Soapy warm water and a clean rag will do the trick once you’ve removed the paint.
Clean your house in 10 minutes with these cleaning tricks. No feeling compares to the satisfaction of a well-organized home, Even if we tell ourselves that everything is for the best, there’s no way to avoid the reality altogether Housekeeping may be a frightening and stressful task. Are you looking for quick and enjoyable ways to tidy your space? House cleaning may be exhausting, so we’ve compiled a list of
Cleansing with lemon vinegar is one of the most effective cleaning techniques available. Lemon peels can be soaked in vinegar for two weeks. As long as they’re soaked in vinegar, these lemon peels may be used to polish just about any surface—bathroom floor
Drop some citrus-rosemary ice cubes in your waste disposal to keep it smelling fresh! Is there ever a time when you pass by your garbage disposal and are scared by As simple as it gets, here’s a cleaning tip that’s as straightforward Citrus peels and rosemary can be placed in each spot of an ice cube tray. Pour some vinegar instead of water into the jar instead. Frozen cubes of citrus rosemary eliminate odours for good.
If you’re still reading, it’ In order to get rid of carpet stains, all you need to do is Spray the stain with the mixture. Steam-iron afterwards, then cover with a moist cloth to prevent Cleaning has never been easier than this!
There are enough stains on the inside of a well-used oven for anyone to give up But don’t worry, everything will All you need is a simple “contraption” for cleaning your hanger wire can be twisted into a wand. Then, using a rubber band, secure a cleaning wipe to the end of the You won’t leave a single area unit
Swiffer pads can be made from old socks
Instead of spending money on Swiffer’s new pads, use an old pair of socks! Cleaning the floor has never been easier. Unbeknownst to most people, socks are produced using a fabric that is excellent for
How to clean a refrigerator in three minutes
One of those cleaning hacks that is more of a system than an actual procedure, this is one of Clean your refrigerator in just three minutes with this simple method.
Get Rid of the Gunk with a Two-Ingred
You might expect your kitchen cabinets to become soiled as a result of all the activity in the baking soda and vegetable oil are all you need to eliminate them. Using a toothbrush, mix the two components together and scrape away
Rub with a little salt
Have you ever considered cleaning with the same items you use to cook? As far as I can tell, it was immediately in front of Cast iron may be cleaned quickly and effectively with a sponge and rock salt. Not a single stain was left behind – no oil, no food clung to the pan
Fix the Problem with Baking Soda
Baking soda, as expected, is here to help. Your couch potato eating stains and grime can easily be removed by adding them to the washcloth that you’ll be using to wipe your sofa! You should always start by figuring out what kind of fabric your sofa is created There is a handbook in this cleaning trick that tells you what type of cleaning each
Stove burners should be soaked in ammonia
My stove burners are the one thing in my house that I’ve resisted cleaning for the longest time. Weirdly, it’s already exhausting to look at. Just putting them in an ammonia-filled Ziploc bag did the trick! Genius!